Alright, before we dive into the instructions, let’s make sure you have everything you need.
First and foremost, you’ll need to have private email hosting for your domain. Don’t have that set up yet? No problem! Here are some resources to help you get started: ✅
- Looking for the best email hosting companies? Check out this list and sign up with the one that suits you best. Just be sure to complete step 2 under your chosen hosting provider.
- Prefer using Our web host to host your emails? Follow this quick signup tutorial to get started.
- Once you have your hosting set up, you’ll need to know how to configure your email account in cPanel. This guide will walk you through it.
- Finally, you’ll need to download the configuration settings for your email. Here’s a guide on how to do that.
Once you have all of these things squared away, you’ll be ready to move on to the next steps for configuring email account on Outlook. Here are the steps:
Add Email Account to Outlook - Quick Step-by-Step Guide
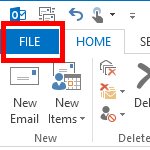
Step 1: Open Outlook and go to the "File" tab
To begin, open Outlook and click on the “File” tab in the top left corner of the screen. This will bring up a menu of options on the left side of the screen.
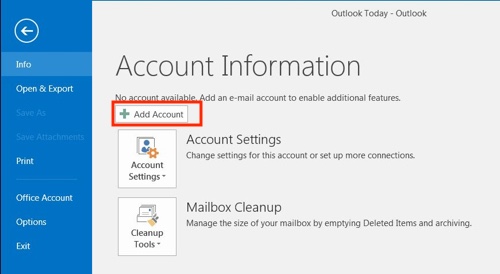
Step 2: Select "Add Account"
From the menu on the left, select the “Add Account” option. This will bring up a new window where you can enter your email account information.
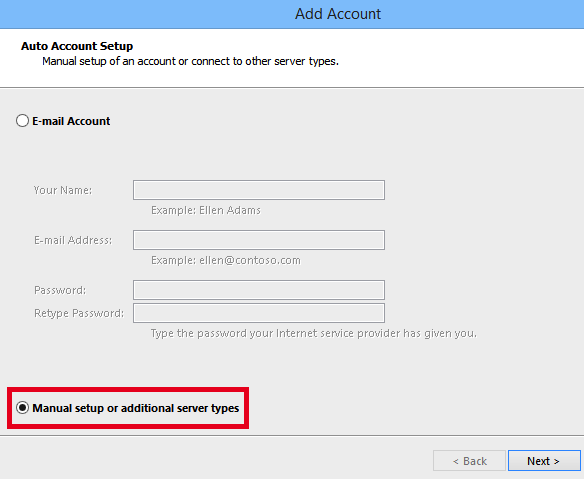
Step 3: Enter your Email Account Information
In the “Add Account” window, enter your email address (i.e. john@yourdomainname.com and password in the appropriate fields then click “Next“
If your Outlook version does not successfully setup your email account using this method, then re-do the setup and choose “Manual setup or additional server types” option. Then click “Next“
Step 4: IMAP or POP3 Manual Setup
At this stage, Fill in your email configuration settings and also choose Account Type: “IMAP” or “POP3“. See example below:
Connecting Emails to your Laptop/PC, Phone & Tablet
Once you have created your new email account. You will need to connect them to your other devices.
The steps are very simple. You simply copy & paste or download the email setup instructions and use them in the email setup stages of your device.
✅ Here’s how to do it:
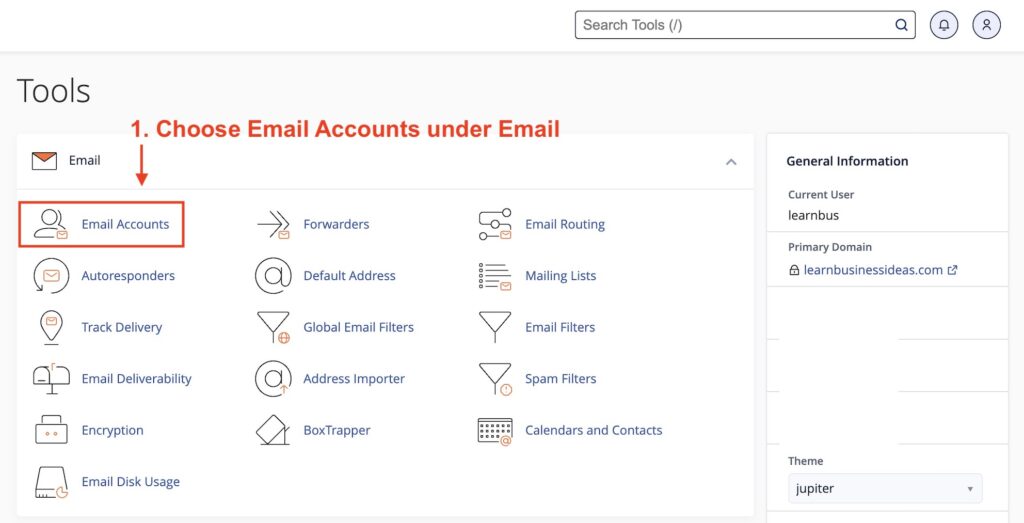
Step 1: Login to cPanel
First, log into your cPanel account and click on the “Email Accounts” icon.
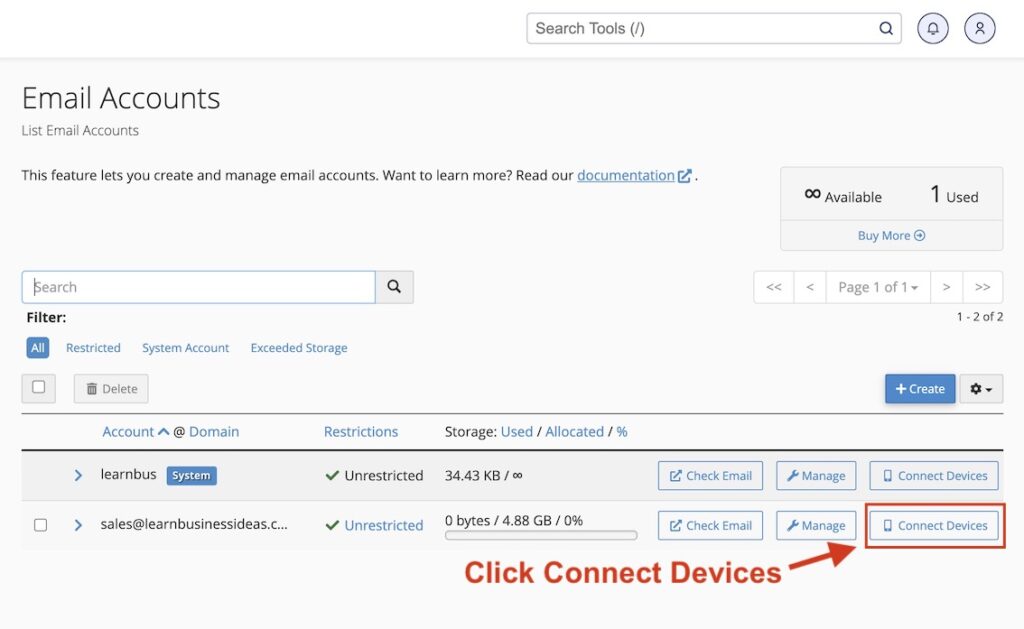
Step 2: Choose Email Account
Find the email account you want to connect and click on the “Connect Devices” button next to it.
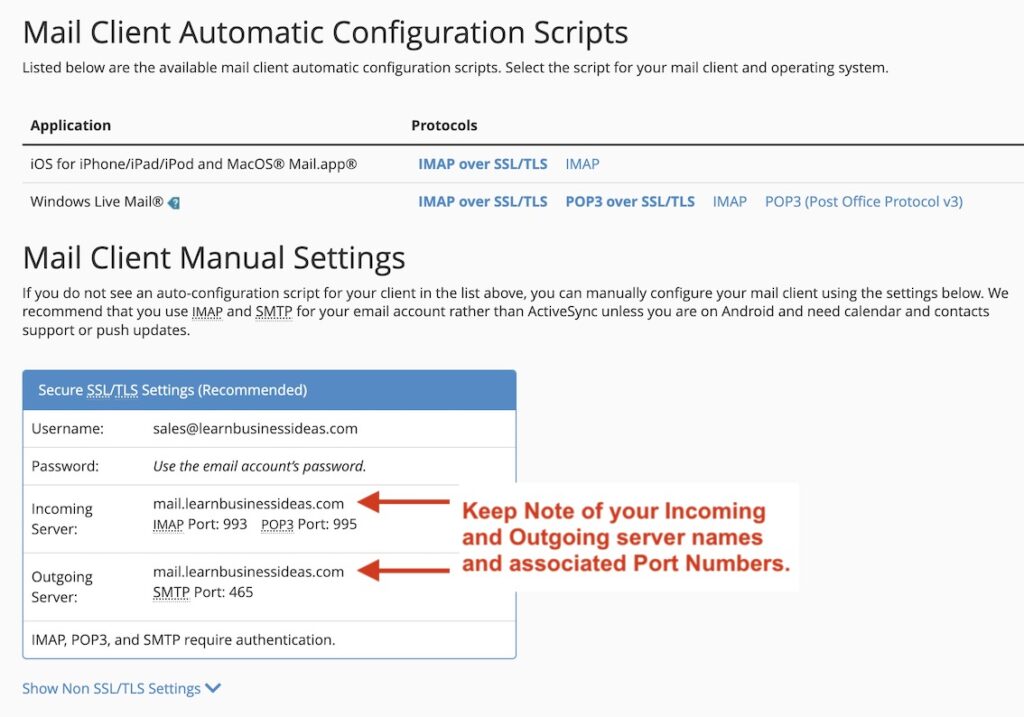
Step 3: Get Your Configuration Settings
A new window will open with the email setup instructions. Copy or download these instructions for use in the setup stages of your device.
The information you need here is what’s under Mail Client Manual Settings.
Any email App or software you are going to use will always ask for what’s on this type of screenshot.
If you are setting up multiple email accounts, 💡there is a way to easily remember these settings.
- Username – basically your email address.
- Password – The password you’ve set up for that email address.
- Incoming Server – The Incoming Server name will be the same for all email accounts in that specific domain name. It is always mail.yourdomainname.com or just add the prefix “mail.” then your domain name – (mail dot your domain name).
- Incoming Server Port Numbers – When setting up emails on any device, you will always be asked if you use IMAP or POP. Whichever you choose, Just keep in mind the IMAP Port number is 993 and POP3 is 995.
- 🙋🏽♂️ IMAP or POP3 – If you are unsure about the difference between IMAP and POP3, I’d recommend you just choose IMAP. IMAP behaves like any other email (@gmail, iCloud, @yahoo, etc.) and automatically syncs across all your devices and server in real-time. POP3 on the other side has its own pros and cons and may confuse some people, read here to understand the actual difference between IMAP & POP3.
- Outgoing Server – Works the same as incoming server. The only difference is the port numbers.
- Outgoing Server Port Numbers – Will be the same for all email accounts in that specific domain name. The Outgoing SMTP Port is always: 465 for IMAP and POP3.
To avoid coming back to cPanel over and over again just for email account settings.
You can also download the copy email setup instructions to your existing email for ease of reference.

Device Instructions
The last step is to now use the instructions you copied or downloaded from your cPanel account to fill in the rest of the setup information, such as the incoming and outgoing server names and port numbers.
Depending on your device, go to settings, find email setup options, and follow the instructions to add a new email account.
Here are the email setup instructions for the most popular devices and mail client apps:👇🏽
Connect Emails to Laptop, PC and Mac Devices
Connect Emails to Smartphone & Tablet Devices
- How to Connect Emails to Android Phone / Tablet
- How to Connect Emails to iPhone and iPad
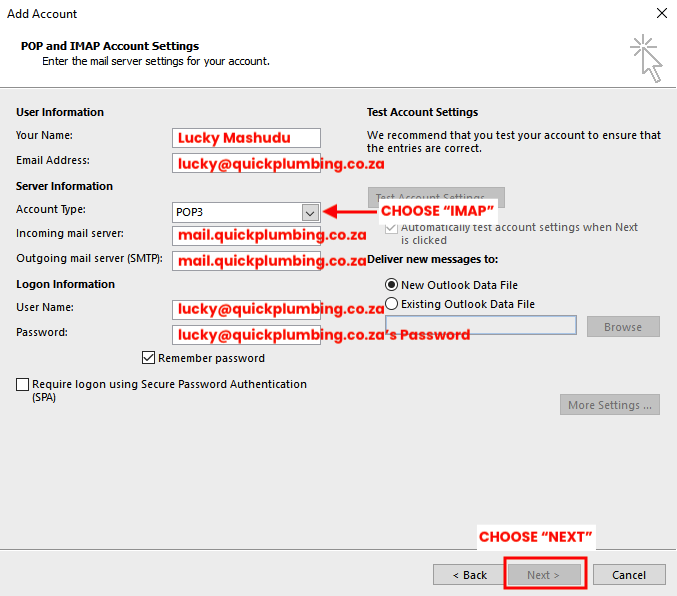
Here’s how to fill in Your Email Account Information:
- Your Name: Enter the name you want to display as the sender of your emails.
- Email Address: Provide your complete domain email address (one you’re setting emails for) .e.g. hello@yourdomain.com
- Account Type: Select either “POP3” or “IMAP” from the dropdown menu. If you are not sure which to use between IMAP and POP3, we recommend using IMAP. Here is the actual differences between the two:
POP or POP3 which stands for Post Office Protocol and IMAP which is Internet Message Access Protocol are two different protocols that determine how your email client (like Microsoft Outlook or Apple Mail) retrieves and displays your emails.
The main difference between the IMAP and POP email protocols is how your emails are downloaded and synchronized amongst your devices.
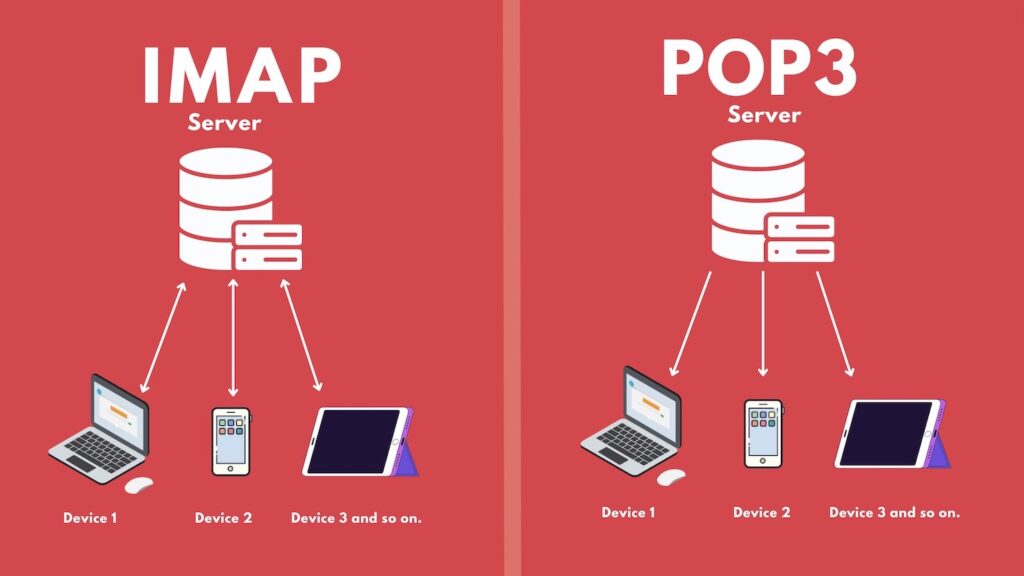
POP is a simple, straightforward protocol that downloads your emails from the server to your computer or device, and then removes them from the server.
This means, with POP, if you access your emails on multiple devices, only the emails that were downloaded to your first device will be accessible on the others.
IMAP, on the other hand, leaves your emails on the server and synchronizes them across all of your devices.
This means, with IMAP, if you read an email on your phone, it will be marked as read on your computer and vice versa.
In general, IMAP is a more flexible and modern protocol, and is often recommended for most users.
However, POP can still be a good choice for certain situations. It’s important to weigh the pros and cons and decide which one is best for you.
So, which one is best for you? It really depends on your needs and preferences. Here are some factors to consider:
- If you only access your emails from one device and don’t need to keep a copy of your emails on the server, POP might be the better choice for you.
- If you access your emails from multiple devices and want to keep all of your emails in sync, IMAP is the way to go.
- If you have a limited amount of storage on your device, POP might be a good choice as it doesn’t keep copies of your emails on the server.
- If you want to keep all of your emails on the server for easy access and backup, IMAP is the better option.
IMAP Pros and Cons
IMAP Pros:
- Allows you to access your emails from multiple devices.
- Syncs your emails across all devices.
- Allows you to access your emails directly on the server, without taking up storage space on your device.
IMAP Cons:
- Can be slower than POP3, especially with a large number of emails or a slow internet connection.
POP3 Pros and Cons
POP3 Pros:
- Generally faster than IMAP.
- Only downloads the emails that you need, rather than syncing them across multiple devices.
POP3 Cons:
- Does not allow you to access your emails from multiple devices.
- Emails are only stored on the device that you use to download them, so you will have to manually transfer them between devices if you want to access them from multiple devices.
- Incoming Mail Server: The incoming mail server for POP3 or IMAP is “mail.yourdomain.com”. e.g. if your domain name is “quickplumbing.co.za” then your incoming mail server will be “mail.quickplumbing.co.za“
- Outgoing Mail Server (SMTP): Use “mail.yourdomain.com” for POP3 or IMAP. Similarly, if your domain name is “quickplumbing.co.za” then your outgoing mail server will be “mail.quickplumbing.co.za“
- User Name: Enter your email account’s username – your account’s username is basically your email account. e.g. hello@yourdomain.com.
- Password: Provide your email account’s password.
Then click “Next“
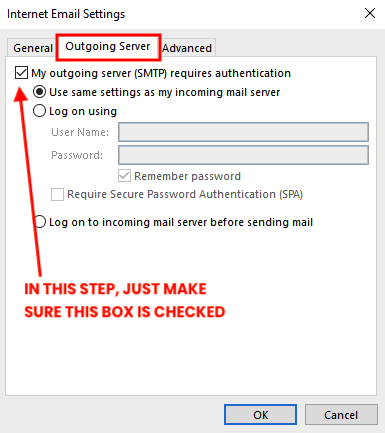
Step 5: Choose Internet Email Settings
In the “Internet E-Mail Settings” popup, skip the “General” tab and Click on “Outgoing Server” tab.
Then make sure “My Outgoing Server (SMTP) requires authentication” box is checked, and “Use same settings as my incoming mail server” is the selected option as shown below. Then Click “OK“
Step 5: Switch to the Advanced Tab (Last Step)
At this stage, enter the relevant port numbers for your server. At mashjoy.com, the standard server port numbers are as follows:
- Incoming Server – IMAP Port is: 993 and POP3 Port is: 995
- Outgoing Server – The SMTP Port is: 465
Or complete the setup as shown below:

Then click “OK“
 End of Tutorial